Tuesday, 2 August 2016

How To Whitewash Brick Walls

Our finished whitewashed walls.


Our large games room, which is really our main living space, has exposed brick walls. In all the years we have been here, I've never really been a fan of this look. I had thought about painting the walls when we moved in but hubby did not like the idea, we had talked about cladding the walls but that was going to cost a lot of money and I didn't see it as a necessary expense.

 I was on Pinterest one day, looking for inspiration and came across a lovely home with white washed exposed brickwork. I showed hubby the images and suggested we could white wash the walls. At this stage he had just repaired the ceiling and I had painted it, so we still had a large tub of ceiling paint left. I figured I would bite the bullet and start with a small area that could be covered up by furniture if we didn't like it.

I started by cleaning the bricks down with a cobweb broom as they were really dusty.


I mixed up a small amount of paint with water in an old bucket. The ratio I used was half paint and half water, then stirred well.


I started painting in the mortar first as this part was quite time consuming, you really need to get the brush into all of the gaps. Then once I did a section of the mortar, I would paint lightly over the entire brick/s.


We have four main walls in the room and I aimed to do one wall every day, or at least every few days when I had spare time. This is a huge room! I had a lot of fun doing this project and it was just so cheap. Painting is quite meditative to me.

A big tub of ceiling paint cost $45 and was enough for me to paint our ceilings and do these walls. Because our bricks are a light colour, I decided to only do one coat. If your bricks are darker I would suggest maybe two coats.


Here you can see the difference in the old brickwork vs whitewashed brick. I love it so much!

I covered up the furniture with old sheets and plastic before painting but wasn't too worried about the carpet as we were getting new flooring soon anyway.

Since doing this project, I have seen white brick wall paper at Masters with quite a high price tag.

So here are the before and after pictures. What a difference a bit of paint can make! 


Before


And after.


Saturday, 30 July 2016

My Frugal Tasks- 31/7/16


Corn chowder and jalapeno sourdough for dinner.

This week has been an absolute roller coaster ride emotionally. Parenting teens can be really hard work! Mr 14 is currently grounded for lying, over a myriad of issues. Sleep has been minimal because he has been unhappy with his punishment and threatened to leave home.

Apparently, he thinks moving out of home is a good idea and had organised to couch surf at different friends houses. No amount of talking to him from hubby and I would change his mind and he had packed a bag on Friday morning. This absolutely broke my heart. My son and I were always so close and the fact he would do this felt like a slap in the face.

I ended up calling his school and spoke to the principal, who agreed he needs to just suck up his punishment and offered to talk to my son. This must have worked because he came home from school on Friday with apologies for his behaviour.

Some days I feel like we are dealing with a war and it will all be a miracle if we make it out of these teenage years without battle wounds.

Despite this, I kept myself busy around the house and got some things done:

-Used the carpet sweeper and broom on the floors instead of vacuuming.

-Made some garlic aioli. We had this with leftover mashed potato patties for dinner and use it in place of mayo.

-Baked bread and butter pudding with leftover hot cross buns from the freezer. Also a double batch of choc chip biscuits.

-Hubby told me we were out of shampoo so I improvised and went through my bathroom drawer full of samples. I poured all the shampoo samples into a jug, mixed well and topped up with a bit of water like it is mentioned by Mr Homemaker. I poured it back into the empty bottle and now have a "new" bottle of shampoo! I did the same with the conditioner samples and this led on to cleaning out the bathroom cupboards, drawers and even soaking and scrubbing the hairbrushes. I got a bit carried away! Then I checked my toiletries stockpile, which was where hubby had "looked" and I found 3 bottles!

-Gave Miss 17 a haircut.

-I started making my first quiet book pages. When finished, the book will be a gift. Hand sewing has really helped with my anxiety too. Its a win- win!

-Had a "camp out" in the lounge room with Mr 10. We watched movies, made pizza pockets for dinner and set up the inflatable mattresses and sleeping bags.

-Saved rain water for the vegie gardens.

-Picked more kale and silverbeet from the garden. We have so much this winter. Luckily we love kale and eat it with most meals.

-Printed out my $60 vouchers from doing surveys. These are for Chemist Warehouse and will be used to buy our medication and vitamins.

-Hubby picked up some free bread and crackers from the op shop.

Also the lovely Mimi at A Tray of Bliss posted a comment I wrote to her and what follows is  a wonderful post on making our days cosy, comfortable and creative. She also has some powerful advice on ways we can insource in our homes.

Hope you have had a great week. xx


Winter quiet book pages.


Homemade garlic aioli.


Using up some free samples.


Free bread and crackers.


Mashed potato patties, pumpkin and pan fried greens.

Wednesday, 27 July 2016

Fizzy Ginger Beer


Quick homemade ginger beer


I have made delicious ginger beer in the past by first making a plant. I use Rhonda's ginger beer from scratch recipe

 But the other day I had some lemon juice to use up and wanted to make ginger beer quickly.
 I wrote in last week's frugal tasks that I would share the recipe for a no plant ginger beer if it turned out well- and it did!

This recipe is from one of my favourite cook books from the 90's called Dollars and Cents- Eating Well For Less by Alison Holst. We use this book every week and it has lots of great and tasty recipes for cooking on a budget. I have altered the recipe slightly as the original used 1 tsp of lemon essence instead of the fresh juice. But use which one you have on hand.

Fizzy Ginger Beer

2 c white sugar
1 TBS ground ginger
1 tsp tartaric acid or substitute 1/4 tsp of citric acid
4 TBS lemon juice
6 c hot water
10 c cold water
1 tsp active yeast

Measure the sugar, ginger, acid and lemon into a large pot. Add the hot water and stir well to dissolve the sugar. You can also boil on a low heat if granules still remain.

When the sugar has dissolved add the cold water, 2 cups at a time, mix well after each inclusion.  Once you have added enough cold water so it has turned luke warm, ladel a portion out into a small bowl and add the yeast. Stir well until it dissolves then add this to the pot and mix the whole lot well.

Pour the ginger beer into clean plastic bottles- I use old soft drink bottles. Leave room at the top of each one for expansion. Leave to sit for 24-48 hours. Bottles should feel nice and firm. Refrigerate before drinking. Lasts about 2 weeks.

Enjoy!


Sunday, 24 July 2016

My Frugal Tasks 24/7/16

Homemade honeycomb.


It's been quite cold here, now we are right in the middle of winter. I'm grateful we still have cold but sunny days, to be able to dry the washing on the line and get a bit of vitamin D! Here's what I've been up to over the last week:


-Made a fresh batch of kombucha and bottled some of the vinegar to use in cooking and cleaning.

-Went for a drive and picked a heap of dandelion flowers which are now infusing in olive oil ready for another batch of healing balm. Mr 10 had a play at a nearby park which was on the way.

-Made 2 jars of dandelion balm and some dandelion massage oil from an older batch of the dandelion oil. 

-Used up some lemon juice and made 3 bottles of ginger beer. This is a recipe from an old cook book that doesn't require a ginger beer plant. If it works out well, I'll share it here.

-Did some cleaning work for a friend. She also gifted me with some empty passata bottles and lovely little fancy bottles, also a big slab of beeswax and some cider from their recent holiday.

-Baked a vanilla and apricot cake and Mr 10 baked a chocolate pudding for dessert.

-Hung the washing outside to dry.

-Started making some little felt finger puppets for a gift.

-Got some free pizza bases and rolls from the op shop. We made pizza for dinner on one night which only cost a few cents.

-Also got a large bag of lemons and oranges from the op shop. I juiced the oranges for drinking.

-Picked more silverbeet and rocket from the garden to use in cooking and salads.

-Saved rainwater for our vegie garden.

-Made some honeycomb for a Saturday night treat.

-Spent only $70 on groceries for the fortnight and as usual cooked all meals from scratch.

-Have managed another week without using the heated blanket instead of the heater to keep warm.

-Bought a cotton baby wrap from the op shop for $1.50, I will sew some felt embellishments on it and it will be a gift for a friend who is expecting.

-Mr 10 and I volunteered at our local animal shelter, then hubby packed us lunch and afternoon tea and we had a bushwalk/picnic.


Kale and cauliflower lasagne for dinner.


Dandelion massage oil and balm.


Homemade ginger beer.


Playing at the park.


Homemade pizza with caramelized onion.


Dandelion flowers.

Tuesday, 19 July 2016

Custard Biscuit Recipe

Lots of biscuits!


This is a really yummy and frugal bulk biscuit recipe. For my US readers, biscuits here are like a cookie. This recipe makes over 50 biscuits and they last for a couple of weeks in a sealed tin or container. They are especially delicious enjoyed with a cup of tea!

125 g butter
125g sugar
1/4 c milk
1 tsp vanilla
1 and a 1/2 c SR flour
1/2 c custard powder

Soften the butter and add it to a large mixing bowl.

Mix together the butter and sugar until it is creamy.

Add the milk and vanilla.

Stir in the flour and custard powder and mix until it forms a soft dough.

Using a teaspoon, scoop up a teaspoon amount of the dough and roll it into a ball. 

Place the ball on a greased baking tray, allowing room for spreading. Continue with rolling the mixture into balls and adding them to the baking trays.

When the tray is full, press the dough balls down with a fork.

Bake in a 180 degree oven for 12 minutes or until golden brown.


Mixing the flour into the butter mix.


The dough is almost ready.


It should form a ball easily.


Press the balls down with a fork.


Perfect biscuits with a cuppa.

Sunday, 17 July 2016

My Frugal Tasks- 17/7/16


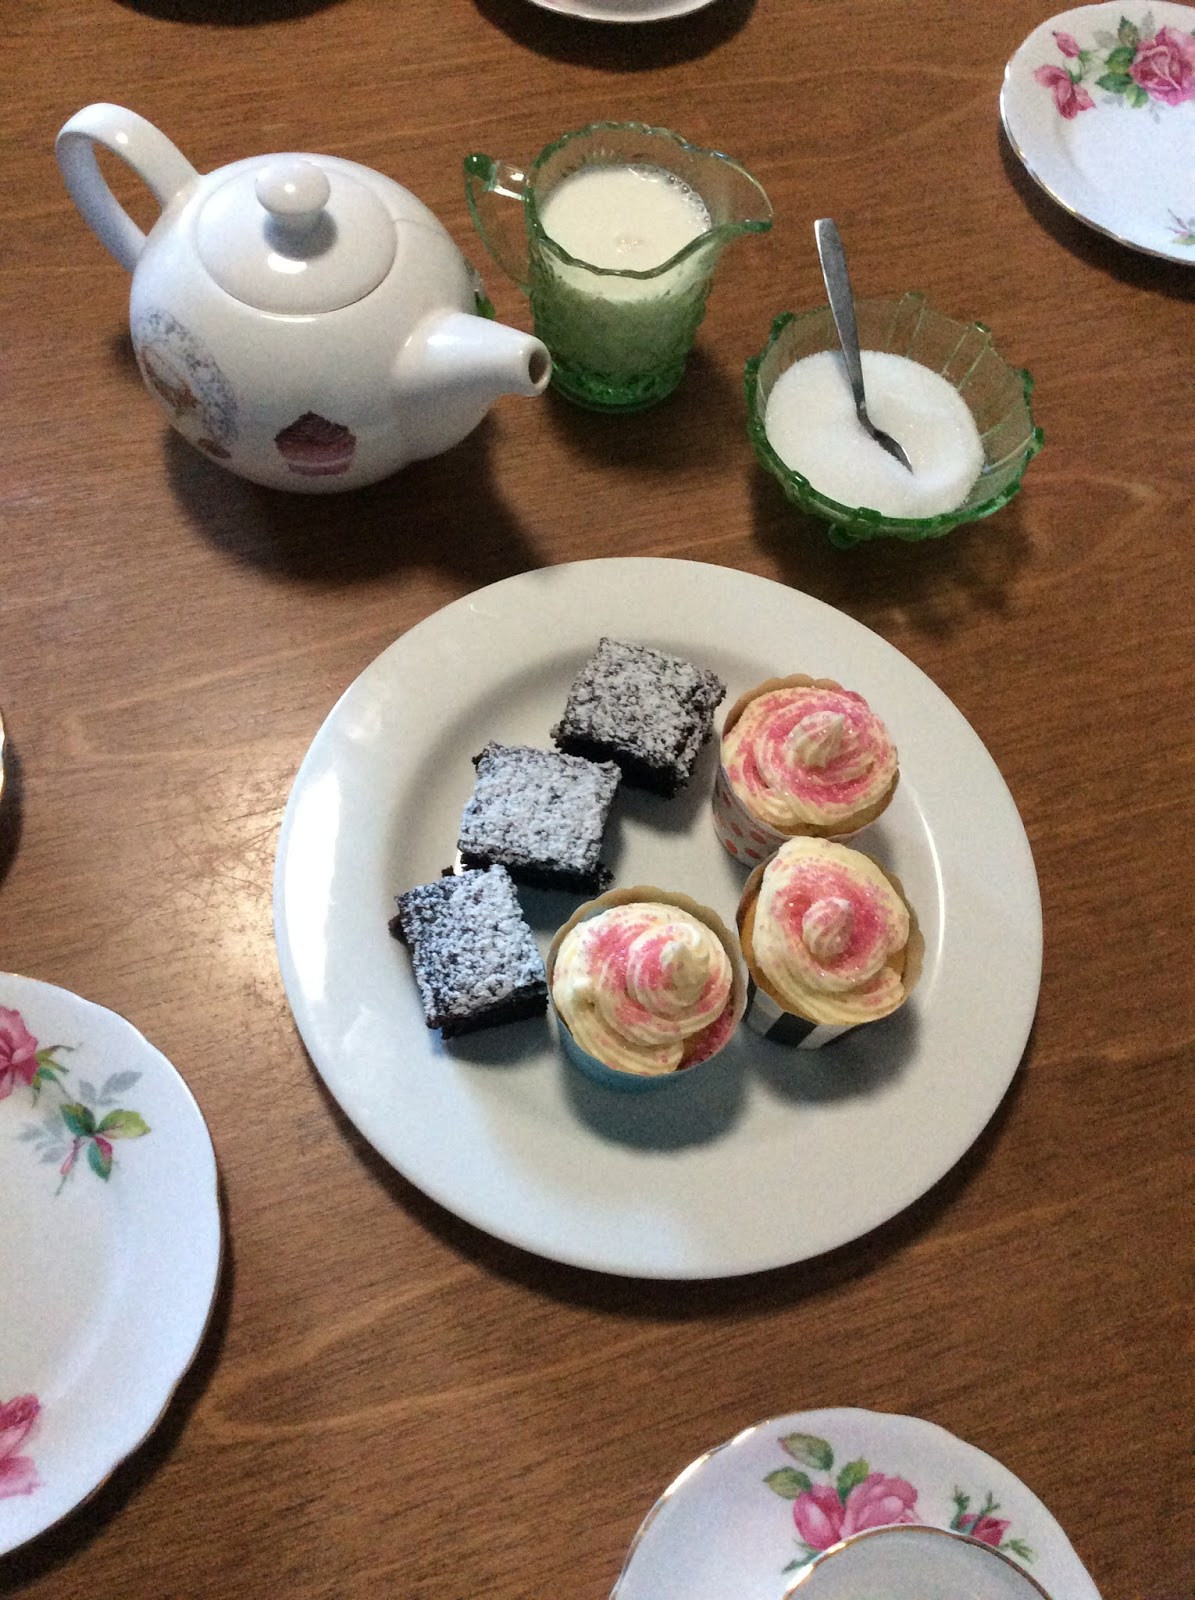
Homemade cupcakes, brownies and a pot of tea


-Ordered some vanilla beans from Ebay. These normally cost around $2.50 each at shops, I got mine for $1 a pod from Vanilla and Co. I also bought the cheapest bottle of vodka I could find and some small bottles from Kmart and made 3 bottles of vanilla extract.

-Took Mr 10 to some free school holiday activities. Our entertainment budget minimal so anything free is a bonus! This week he went to an art class, recycling activity, Lego workshop, made an emoji pillow and went on a snow slide.

-While Mr 10 and I were in the city for the snow slide, we had lunch at a cheap vegetarian cafe, stopped into Kakulas Bros and bought some TVP and  white pepper for the pantry and also piece of turkish delight each. We also visited the art gallery and bought some donuts. Total cost for the day was under $20. If you're in Perth, Kakulas is the cheapest place I've found for buying spices, legumes, dried fruit, herbal teas etc.We also picked some herbs and calendula flowers from the city's Urban Orchard.

-Picked more kale and silverbeet from our garden. We've been enjoying this as a salad with most meals.

-My stepson came over for a birthday dinner at our house. We made TVP bolognaise, garlic bread and vanilla cake.

-Shopped around for our home insurance which is due this month and by changing companies I saved $200.

-Did lots of washing and hung it out to dry on sunny days. It is forecast to rain all of next week so it was important I get it all done.

-Started making a solar oven using cardboard boxes, foil, newspaper and perspex. All items we already had. We get quite a lot of sun up by our pool so hopefully when it's finished we can cook some yummy food in it for free!

-Used up some meals from the freezer. We had pasta bake and pumpkin soup. There was also a night where we all ate different leftovers for dinner.

-Received some icpoles, icecream and a few bags of frozen mixed berries from our neighbours.

-Used the heated blanket to keep warm in the evenings.

-Baked some cupcakes and brownies with Mr 10 and had fancy afternoon tea at home.

-While at the library with Mr 10 I checked the discard pile and got 6 Australian Country magazines for free. If bought new, these would be worth over $40 worth.

Hope you have had a great week! x


In a few months the vanilla extract will be ready.


Mr 10 on the free snow slide


With his newspaper seedling pot.


And practicing his icing skills


Homemade brownies


Tuesday, 12 July 2016

The Gift Cupboard


Homemade foodie gifts in the gift cupboard.


Now that it is mid year, I thought it would be a perfect time to tidy up and reassess the gift cupboard. Because, quite frankly, it was looking really cluttered in there and I had forgotten about half the things I had made! I wanted to take stock and focus on what kind of gifts I need to concentrate on making for the rest of the year.

I've mentioned before that this year I've been participating in Annabel's Christmas Challenge which involves crafting gifts for Birthdays and Christmas during the year. This really helps with being organized, saves money, avoids overspending and gives me craft to do all year around.  Also I have gifts at the ready if something unexpected pops up or someone I know is having a bad day. I wrote more about why stockpiling and having a gift cupboard is important to me here.

My gift cupboard is really just 5 shelves in my bedroom built in wardrobe, as this the only place I have room to keep everything. You don't need a designated cupboard really, just a bit of spare space to store the gifts.

I decided to designate the shelves for particular gifts. On the first shelf I have edible gifts like raspberry jam, onion jam, dandelion jelly, sweet mustard pickles, tomato relish, chilli and garlic oil, hot chocolate mix and herbal tea mix. I've just ordered some vanilla beans on Ebay (much cheaper than the supermarkets!) and plan to make some vanilla extract for gifts as well.

The second shelf is all store bought beauty products. There is moisturizers, bath soaks, body sprays, bath bombs and some make up. These were all bought for 50c-$2 each on clearance sales.

Third shelf is my handmade items. There are bottles of mineral bath salts, soy candles, natural face scrub, dandelion salve, bubble bath and soap packs, lip balm and bath bombs.


The fourth shelf is random handmade items like tea cup soy candles, heat bags, soy wax melts and a basket which holds packaged felt Christmas ornaments.

The bottom shelf is for kids gifts. Some hand made and some again, bought on clearance. Lots of colouring books and sticker packs, bubble wands, felt food, dress ups, sock dolls, paper window stars, and tie dyed/bleach resist tees.


By tidying up my shelves, it has become apparent that I have plenty of gifts for women/girls! For men I will probably make rocky road, fudge, biscuits, that sort of thing but this will be made closer to Christmas. I have a few friends with toddlers and babies due, and need to make some family gifts so I've been looking at Pinterest for ideas and that will be what I will focus on making for the rest of the year.

Do you make any homemade gifts?